How To Upload your GIS data to Mapify and edit it in your browser
September 6, 2021
Mário Sobral
In this post we’ll show you how to edit your spatial data online by using Mapify Editor to select a Dataset and perform editing tasks on your spatial and non-spatial data. And we’ll do it all without having to write code :-). If you want to dive right in the deep end, feel free to request a Mapify trial here, or click here to schedule a talk with us.
Using Mapify Editor to edit your spatial data online in seconds
It is important to have your data in a scalable and globally accessible platform, but your data should also be easy to update and edit. That’s why you have Mapify Editor available and accessible directly from the console to allow you to quickly and easily edit your data right on your browser!
Let’s get started. First of all, log in to the Mapify Console using your credentials (you can request a Mapify trial here).
In this article, you’ll be playing with data that is kept in a Mapify Dataset, so the first step will be to create one (you can also use one of the available datasets in your account).
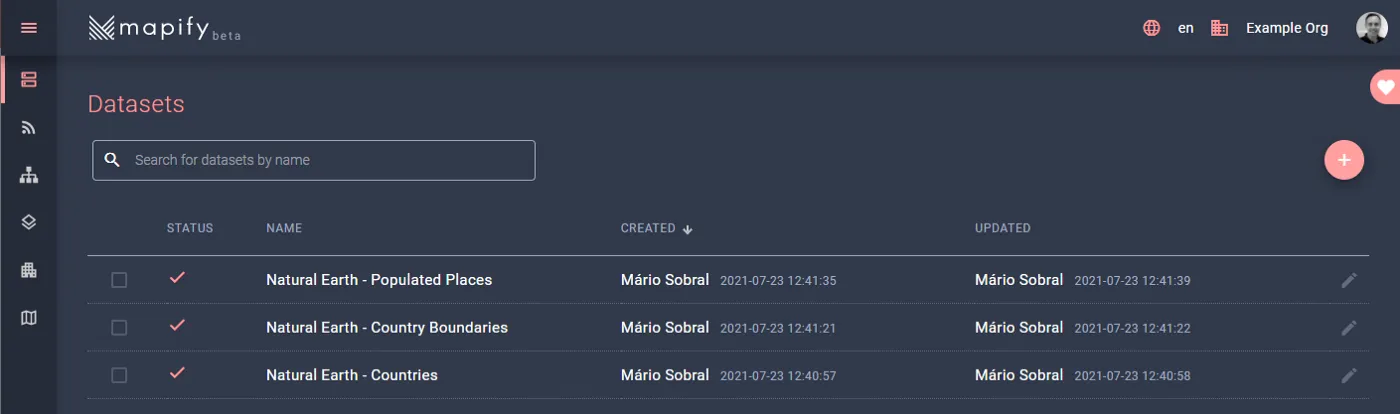
Log in to the Mapify Console, and navigate to the Datasets list screen.
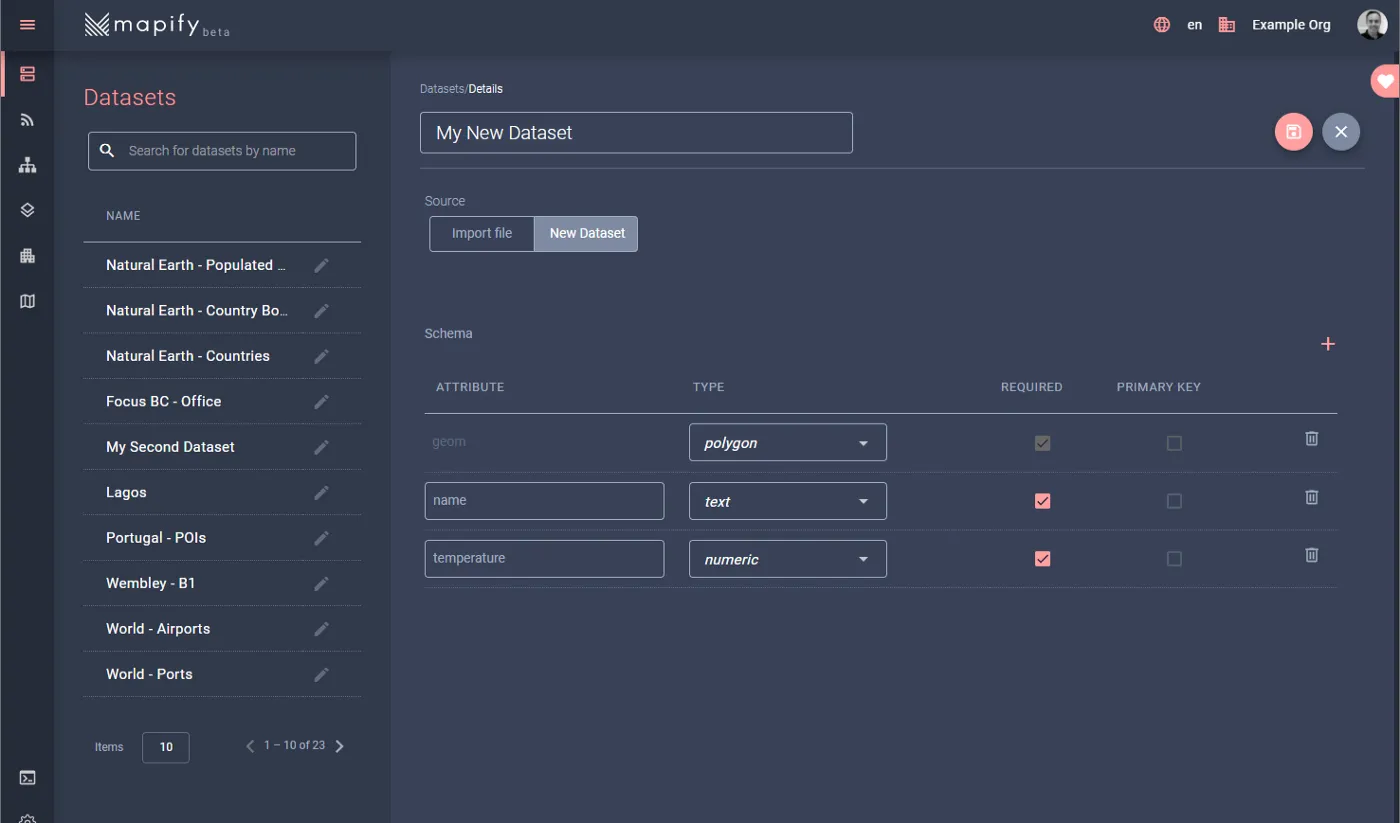
Click on the (+) and you will be shown the Dataset creation screen.
Name your Dataset My New Dataset (I never said you needed to be original) and select “New Dataset” from the dataset creation toggle button. Specify the type of features that your Dataset will contain, by selecting polygon from the Type column for the Geom attribute.
Add a “name” and “temperature” attributes to your Dataset, of type text and numeric, respectively. You can leave them as required, and we won’t worry about setting a primary key in this example. Your Dataset creation screen should look similar to this:
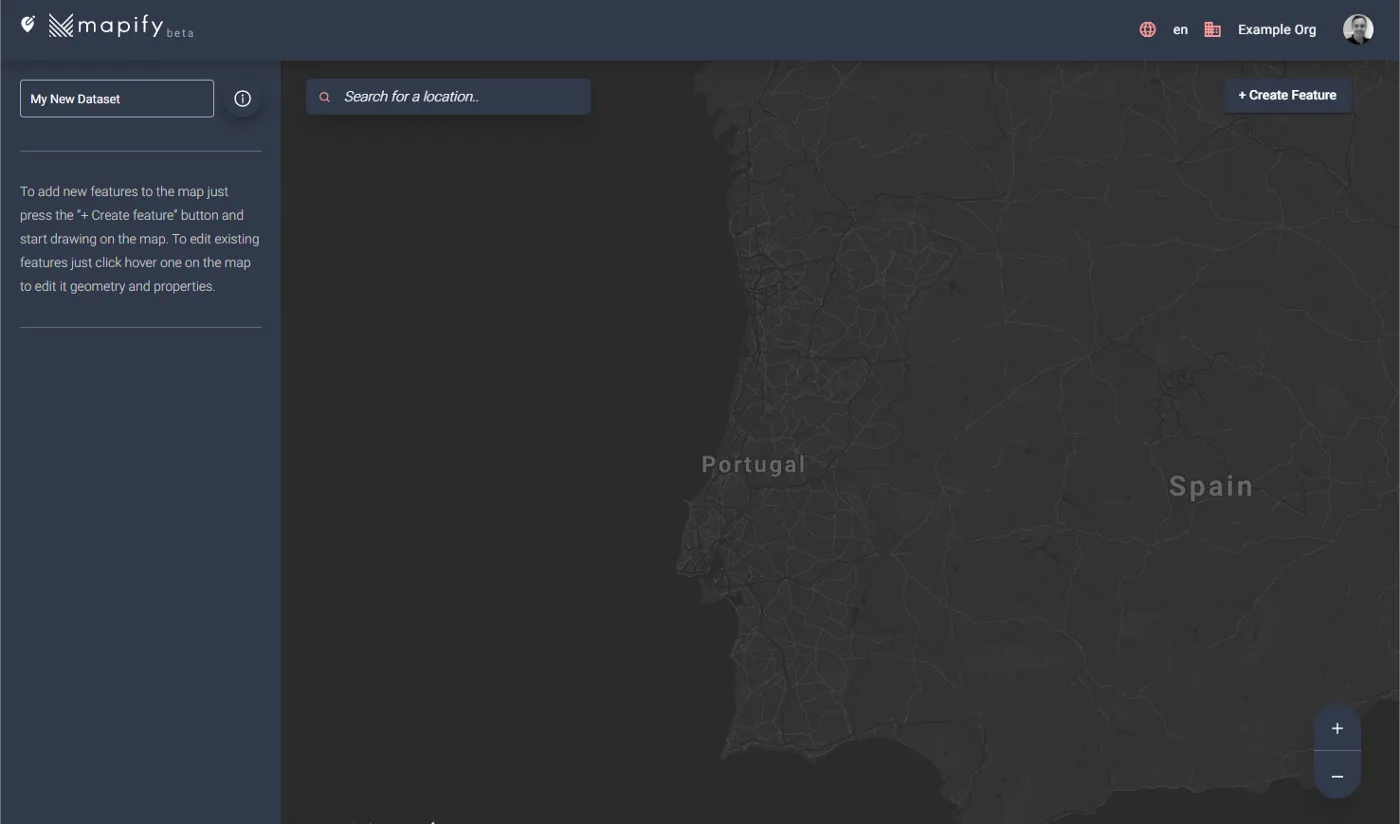
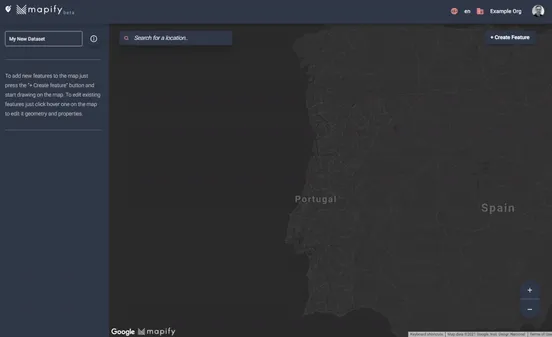
We don’t have any data in our Dataset, so let’s add some ! From the Dataset list screen, click on the My New Dataset row to open its details screen. You should now see the “Edit data on Mapify Editor” button, which you can click to open the Mapify Editor in a new tab, but already in the context of the selected Dataset.
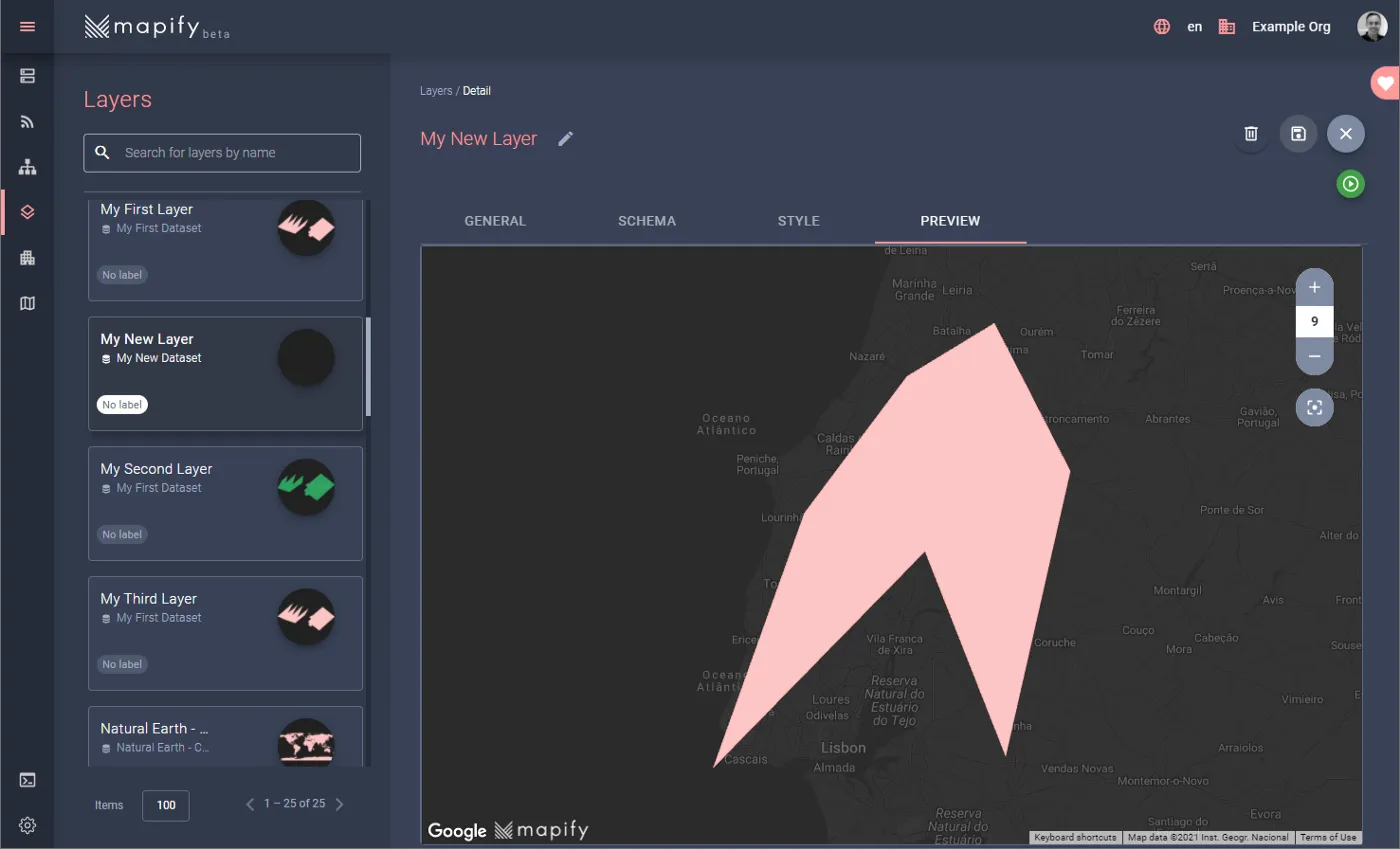
Since the Dataset is empty, the map preview will display the whole globe, but you can zoom to the area where you want to start adding features. In this example, I have zoomed until Portugal was filling about a third of the map preview control. You can also use the search box to quickly find the location you are looking for editing.
Now, click on the “Create Feature” button and Mapify Editor will detect that the Dataset was defined to hold polygons, and provide you with a context aware editing tools bar, in this case allowing to opt for the type of shape that it will provide you drawing assistance with :
- Rectangular
- Circular
- Free Shape
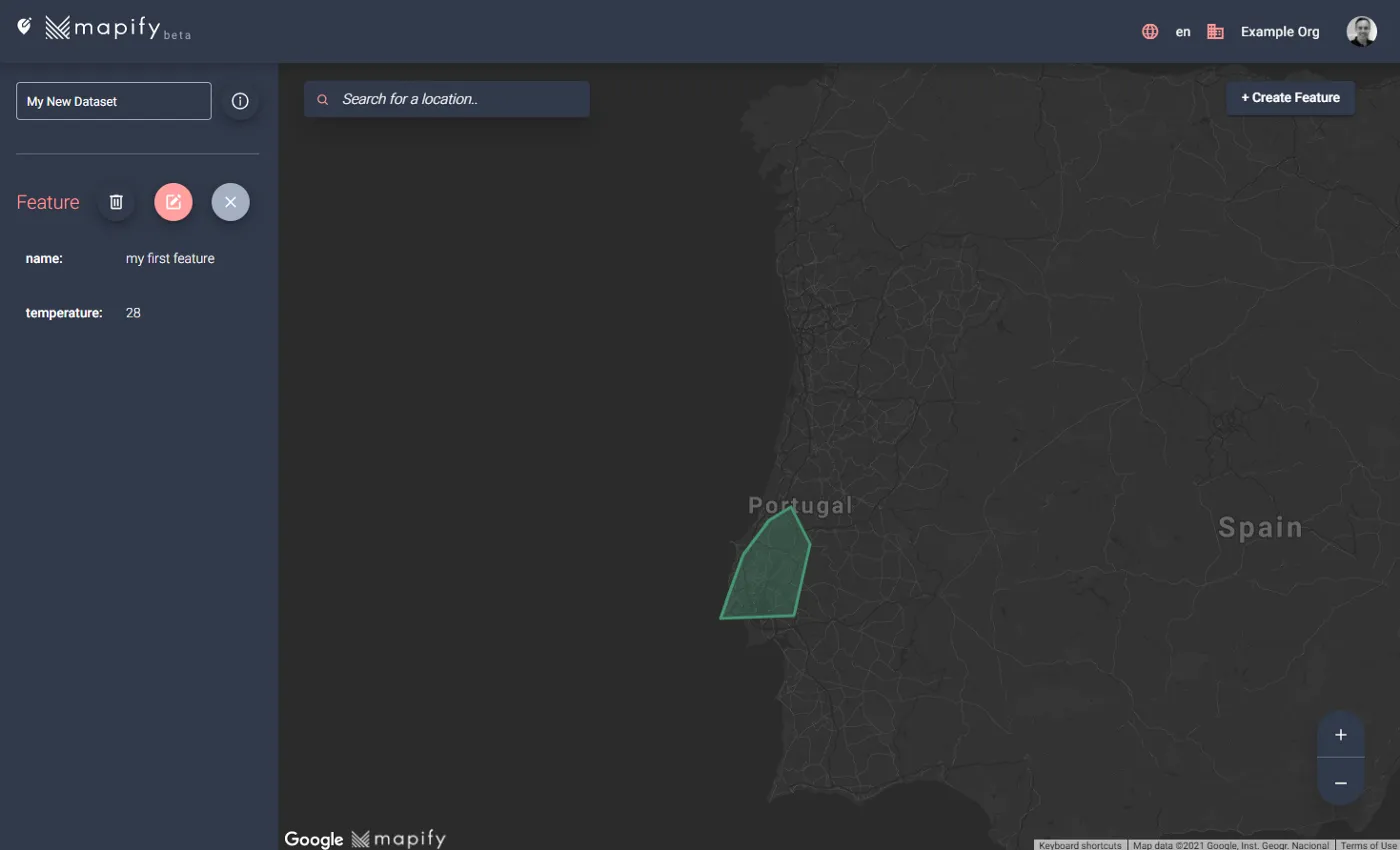
It will also open the feature details panel on the left side, with the list of attribute values for the feature which you can fill with values.
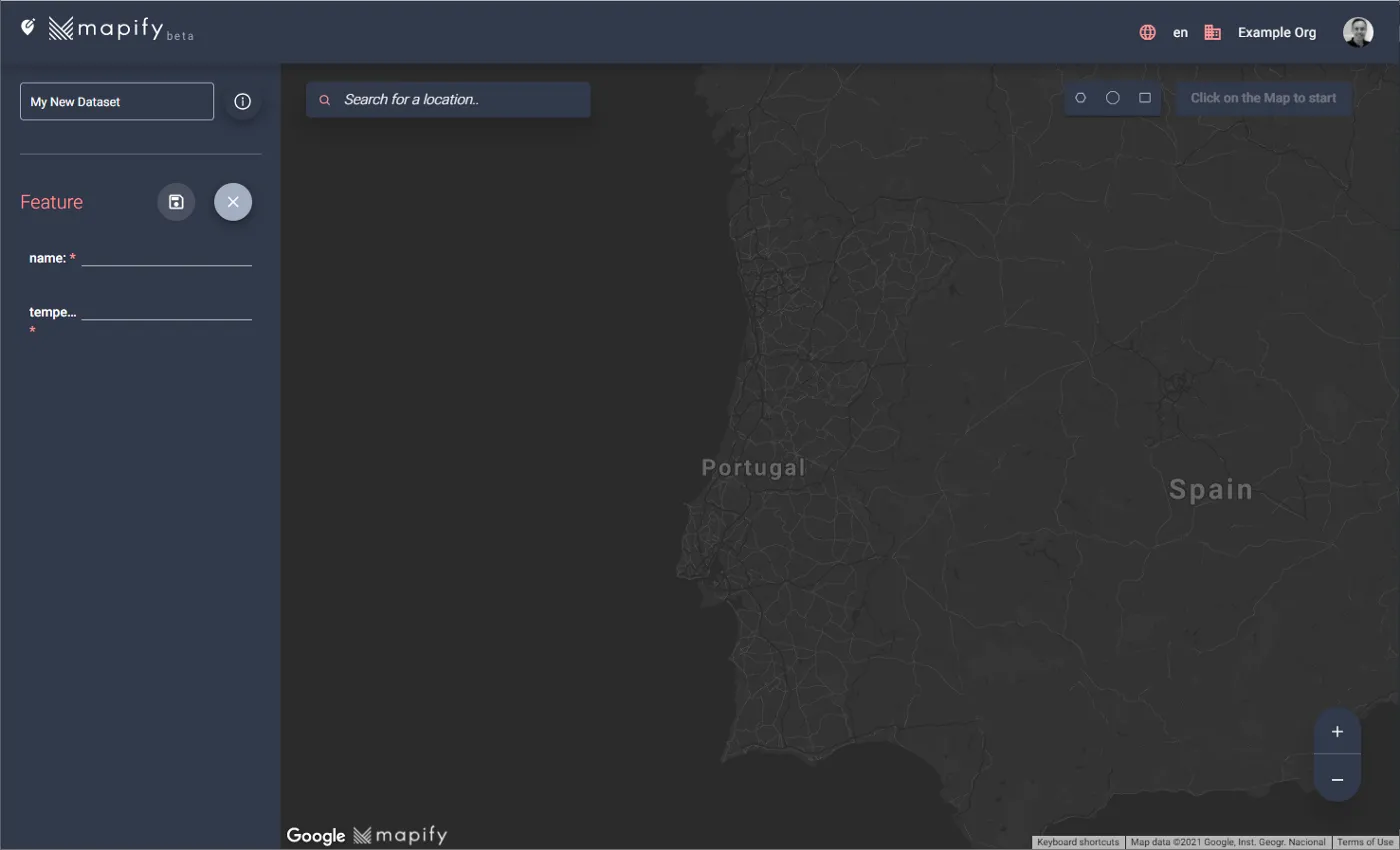
Let’s start with the fun part and draw a new polygon! Click on the free shape icon from the editor toolbar, and click on the map where you want the first polygon vertex to be. This will begin your feature creation process, and you can add vertices to your polygon feature by moving the mouse and clicking where you want your next vertice to be. Repeat the process to fully draw your polygon and don’t worry about being precise right now, this is just a simple tutorial to show you how you can create and edit features. When you believe you have enough vertices in your polygon, double click and Mapify Editor will connect your last vertice to the first.
After adding a name and a temperature value for this feature, your should have something like this:

Click on the Save button in the feature details panel, and your changes will be committed to the Dataset.
Notice how you now have your feature selected don the map and three buttons on the feature details panel:
- Delete: Deletes the selected feature
- Edit: Enables edit mode for the selected feature
- Close: Closes the feature details panel and de-selects the currently selected feature.
You now have data in your Dataset, but data is only interesting if we can do something with it. Keep reading for some more amazing stuff from the Mapify Editor!
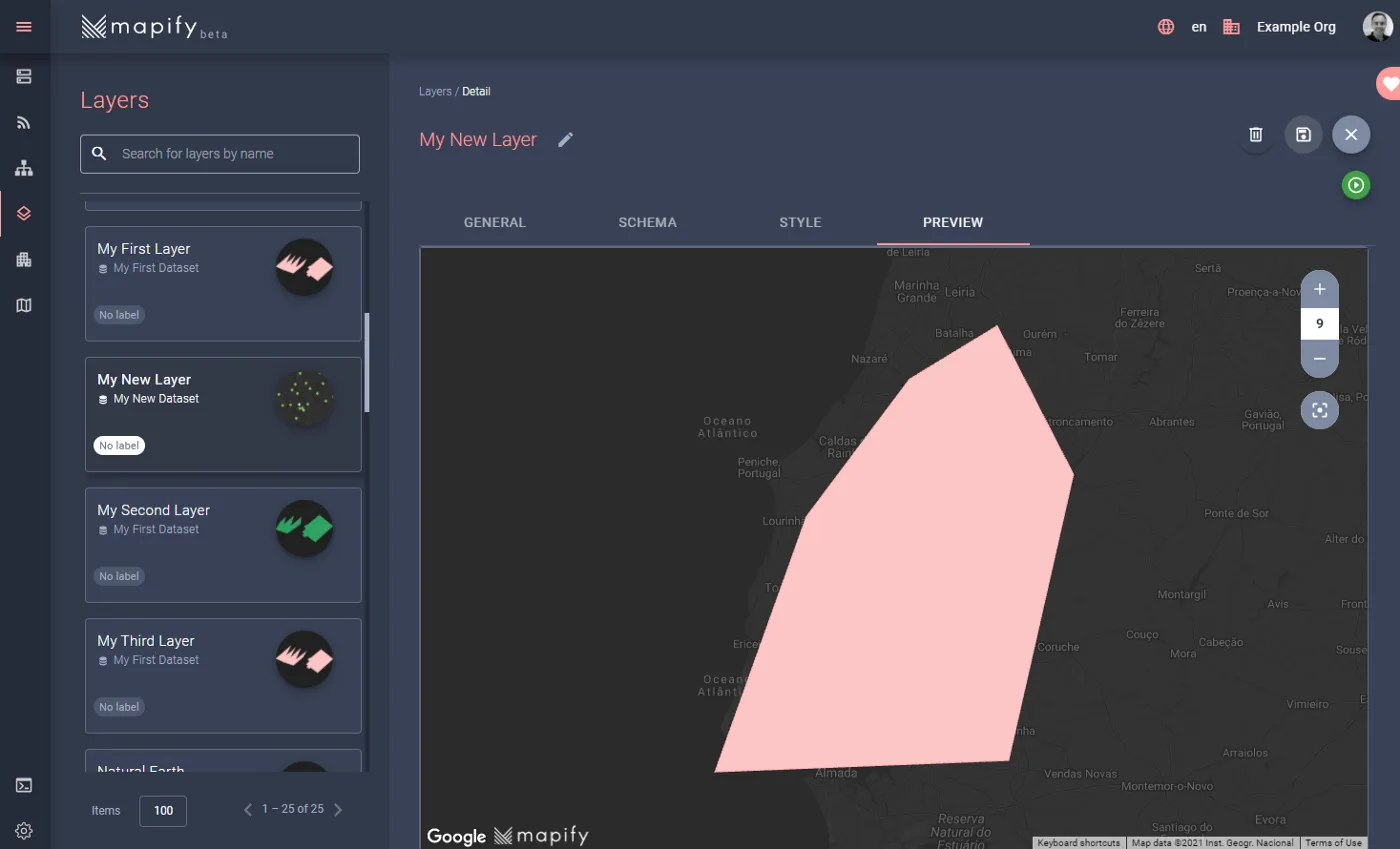
In real world scenarios your data will be rendered through Layers, so create a new GeoJSON layer based on the My New Dataset and name it My New Dataset (I will assume that you have read the previous Mapify articles and walkthroughs, and no go over the process in this article). Since it is not a Realtime layer, don’t forget to publish the layer, and then confirm in the preview layer that you can see the polygon you created earlier (it will have the default styling, but you can change it later if you want).
Go back to the Mapify Editor where you have the My New Dataset, select the feature you created earlier, and click the Edit button.
Drag one of the vertices in such a way that you can later clearly see that a change was made to that polygon. As you drag vertices around, you will have access to the “Undo” button, to revert the vertice to the previous position, in case you made a mistake.

Click the Save button. Click the Close button.
Mapify Editor detects that changes were made to the Dataset underlying data, and will display a “Publish Layers” button that you can use to publish all layers associated to the Dataset. This provides you with a quick and easy way to make your changes available to all applications using the respective layers!
Once all layers have been published, the preview panel will update and render the preview of the committed version of your Dataset.

The layers published in this process will be listed on the left side, and you can easily open the Mapify Console directly in its preview screen by clicking the respective preview button.
I hope you enjoyed this walkthrough and can now see the amazing and powerful editing abilities of Mapify!
Learn how to use Mapify Editor to edit your spatial data online in seconds with just a few clicks of the mouse.
Ready to power your solutions with Mapify ? Feel free to request a Mapify trial here, or click here to schedule a talk with us and we’ll show you what Mapify can do for you and your business.