Mapify is perfect for handling data from wearables
February 28, 2023
Mário Sobral
.webp)
Smart devices have become a part of our daily life and they are getting smaller and smaller, to the point that most of us carry at least one smart device with us pretty much at all times, our phone.
Smartphones are a commodity now, but smartwatches, fitness trackers, heart rate monitors, smart rings, and many other wearables are catching up. Smart wearables are being adopted across different industries such as sports, healthcare, retail, defense, manufacturing, and lifestyle. Major brands like Apple, Google, Samsung, LG, Sony, Xiaomi, and Nike are tapping into this market.
"The global smart wearables market is expected to grow (...) at a compound annual growth rate of 14.1%. The market is expected to reach $31.95 billion in 2026" - BusinessWire.
Wearables are able to collect data from their sensors and send it in real-time to a cloud-based platform. This is usually achieved through a Bluetooth connection to the user's smartphone, but many devices already provide the ability to connect to the internet on their own.
3 Steps to get Mapify to process data from a Garmin device
We allow you to handle incoming data from wearables and process it at scale with minimal setup and code. Achieve a faster go-to-market and do not worry about handling all the incoming IoT data.
We're going to show you how wearables can send data to Mapify and Mapify is able to display it in real-time on a map. We have some sports fans in our team using Garmin devices and cycle computers, so we're going to use the Garmin IQ app for data.
- Set up Mapify to handle your wearable's incoming data.
- Create your Garmin IQ app.
- Publish the data to a Data Feed.
- Install and use the app.
Keep in mind that since Mapify is an API-first platform and exposes all its features through a standard REST API, you can do this for pretty much any wearable that can connect and communicate over the internet.
1. Set up Mapify to handle your Garmin device's incoming data
To do this you will need to create a few things in Mapify: a dataset, a layer, a data feed, a workflow, a map, a no-code web app, and an API Key.
If you don't know what any of these terms mean, check out our Mapify Documentation.
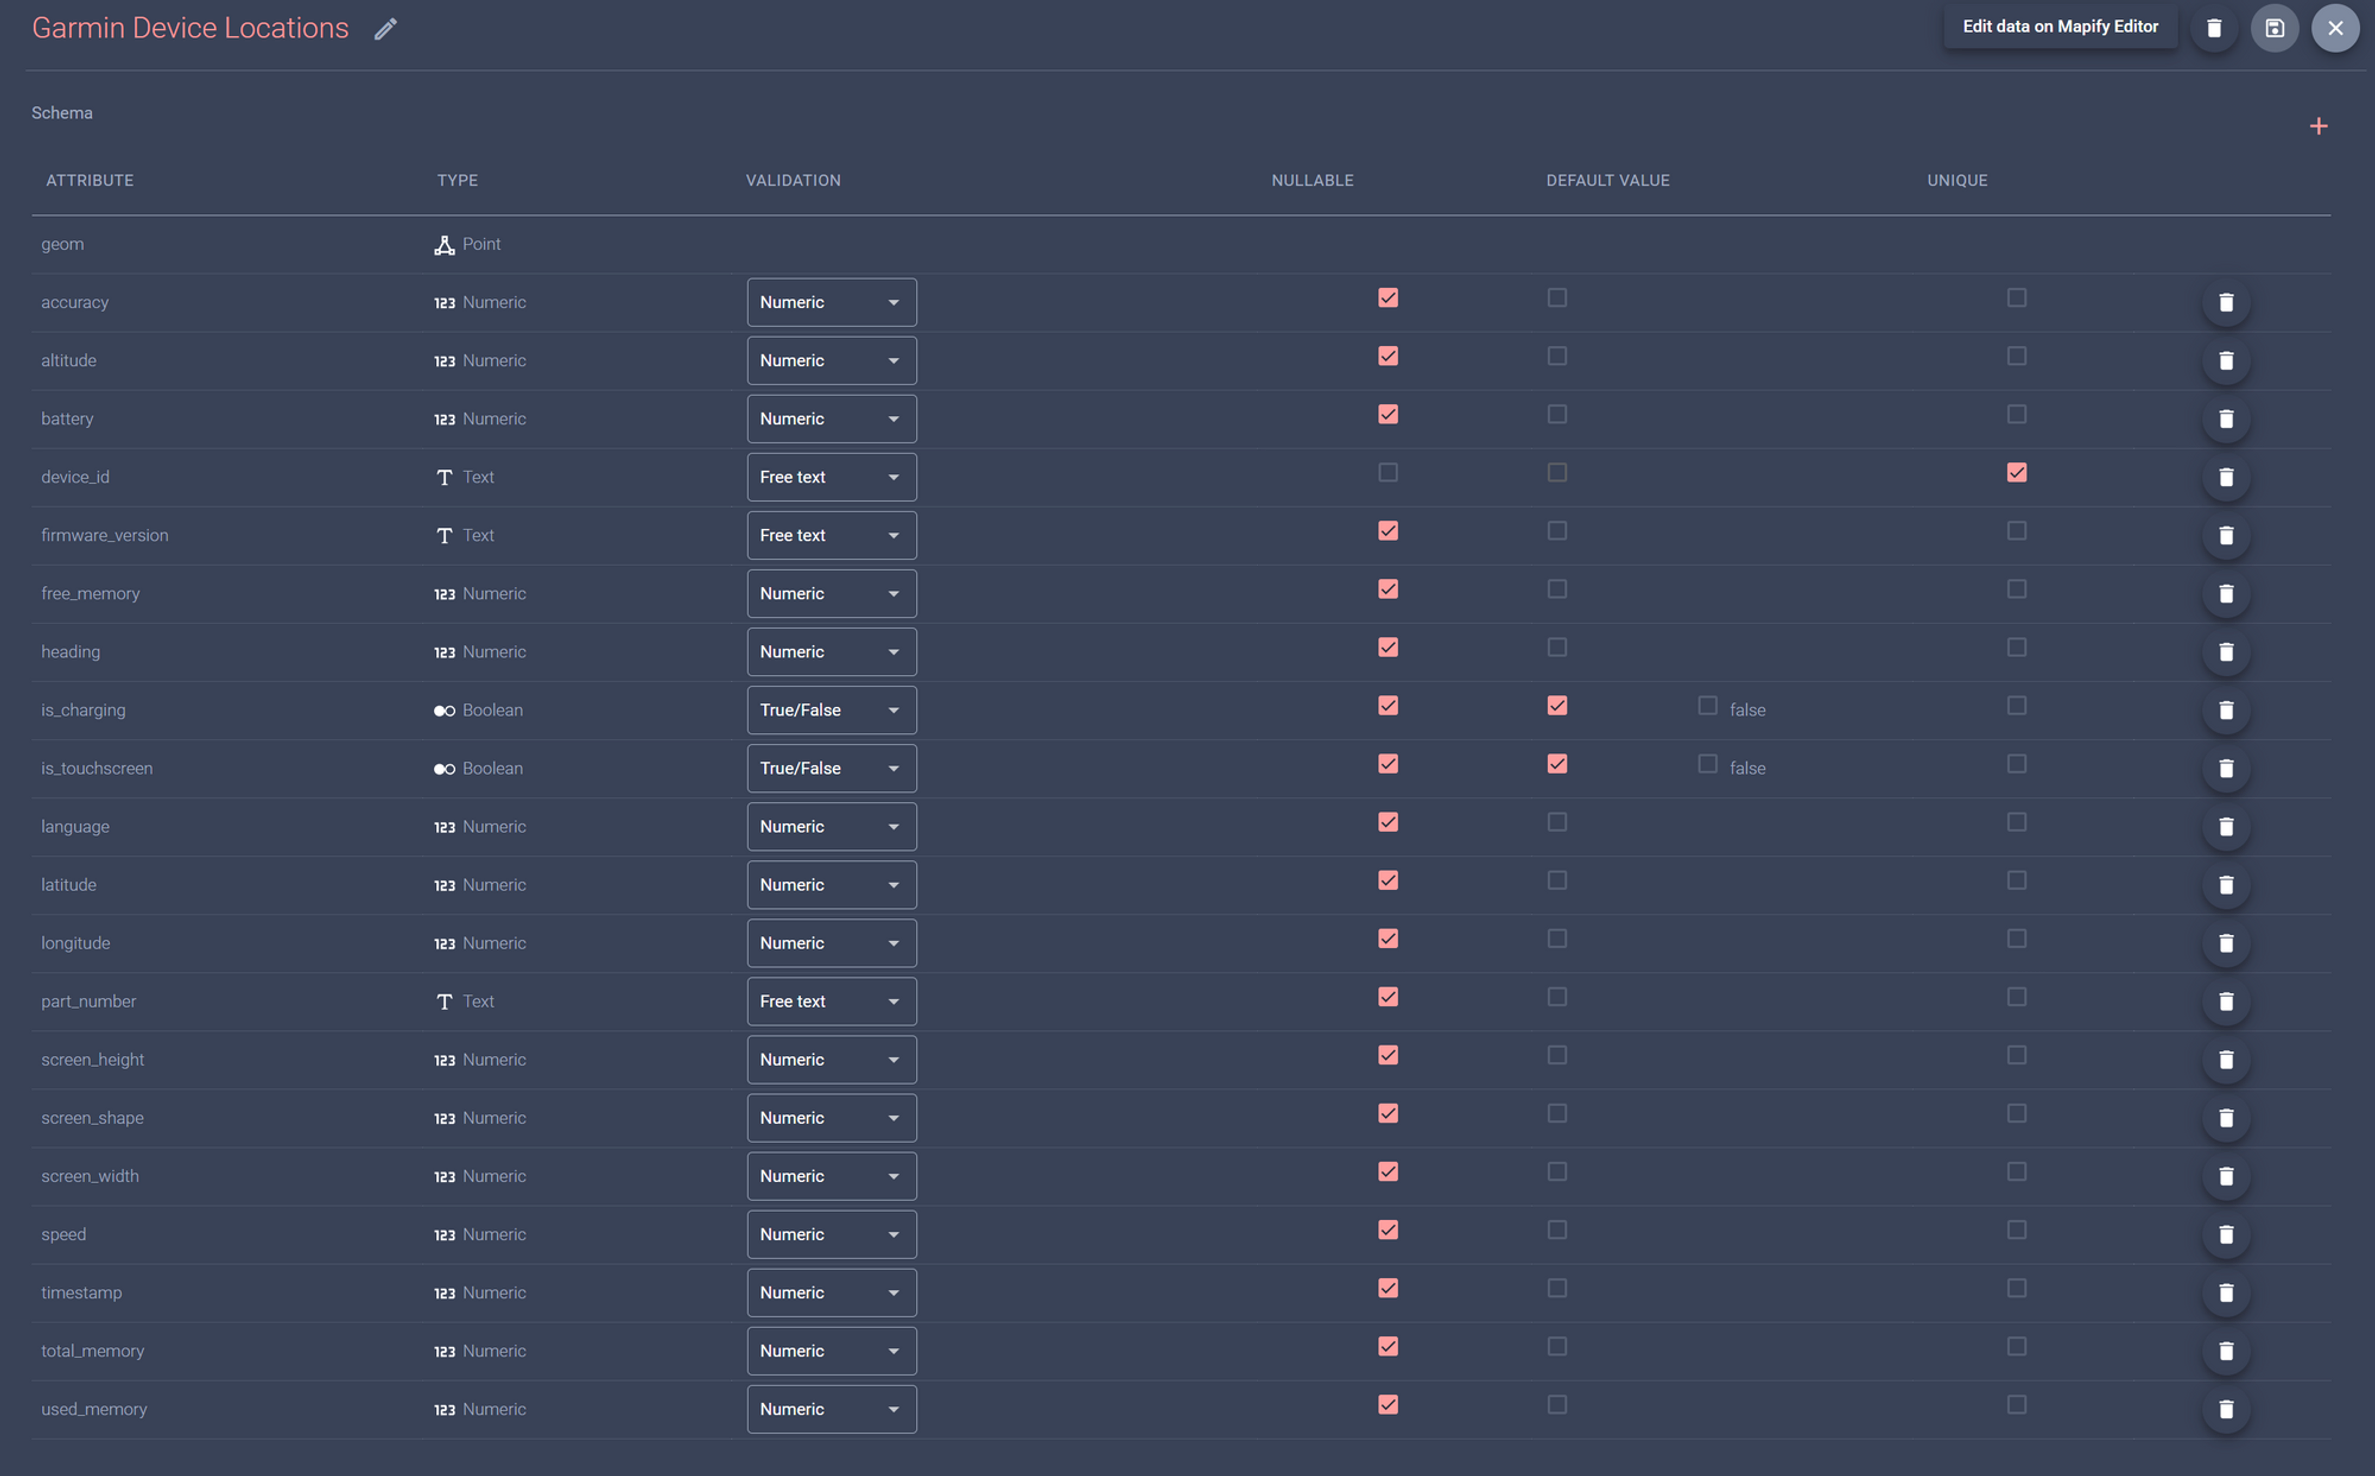
Dataset - You need a points dataset to hold at least the latest position recorded. The dataset is what will allow you to display the data in a layer and a map. The fields you include in this dataset will depend on the data you will be sending and want to display, but for your reference, the screenshot below represents the dataset we created for this example.
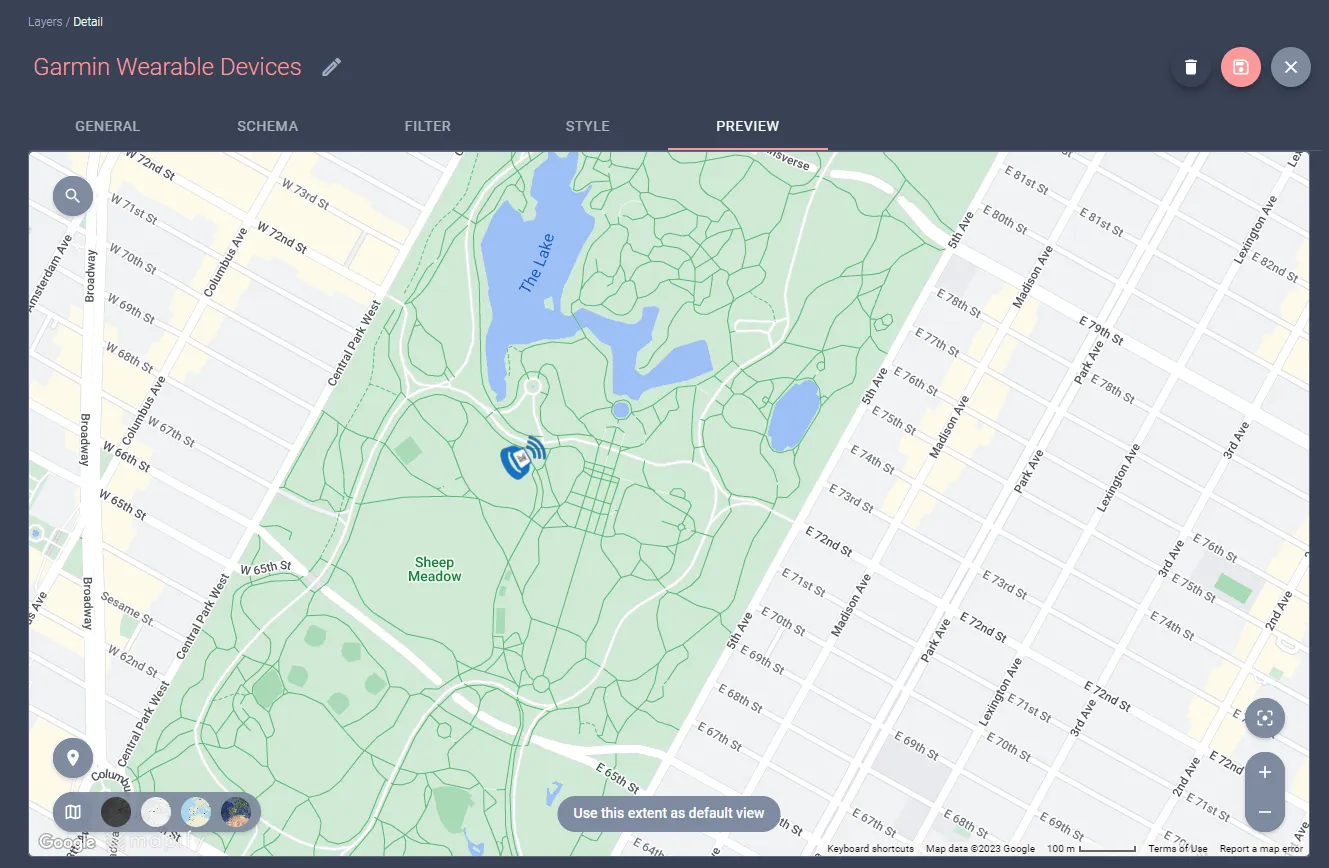
Layer - To render your data on a map, you will need to create a real-time layer from the dataset you just created. We configured our layer style to use a smartwatch icon just for fun.
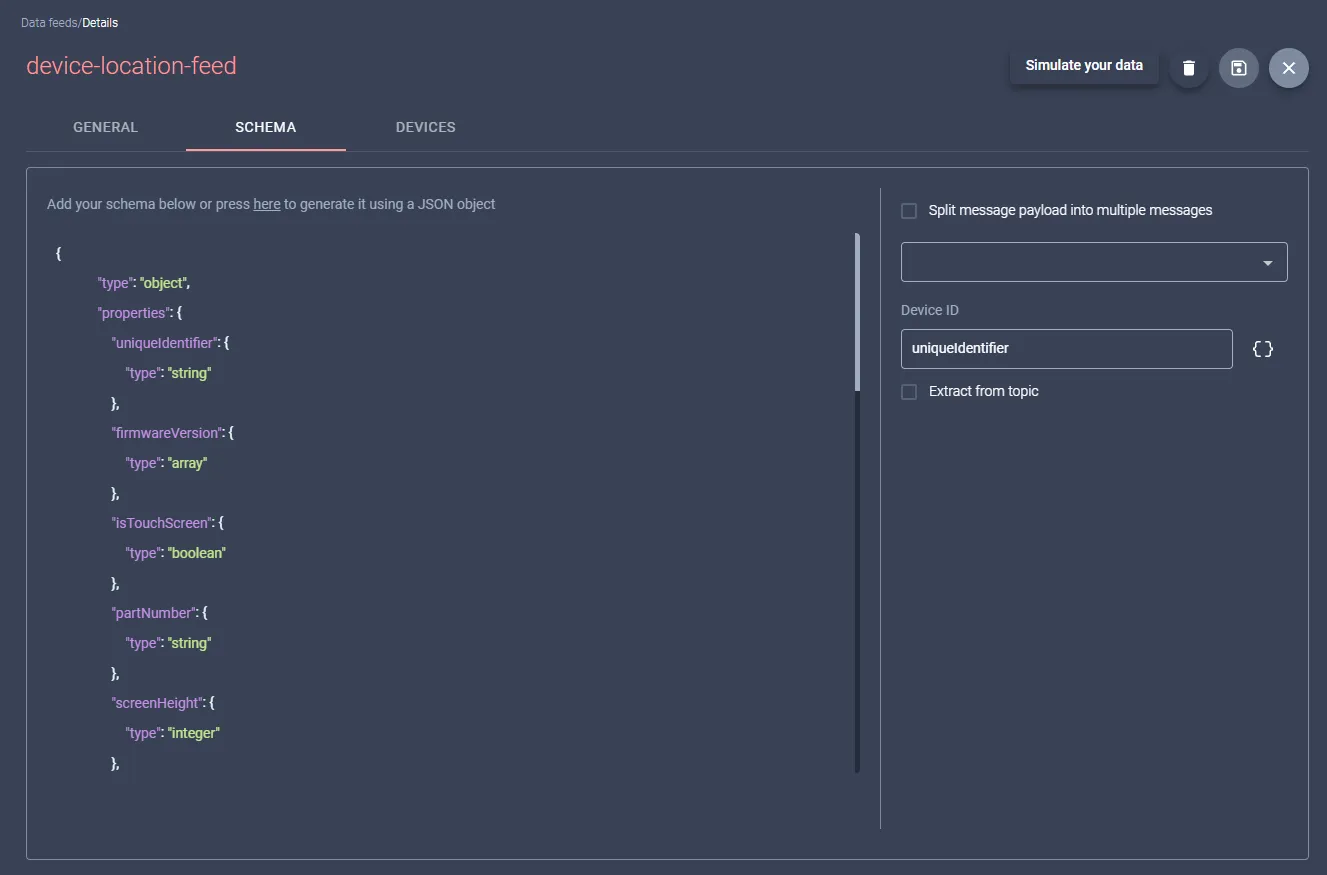
Data Feed - Data Feeds are used by Mapify to handle streams of incoming data in real-time. So, you'll need to create a Data Feed with the "Send data to Mapify" option selected. To create a data feed you need to know the schema of the incoming messages and specify it in the Data Feed schema as shown below. For the purpose of this article, we created this schema for the messages that we will be sending from the Garmin IQ app.
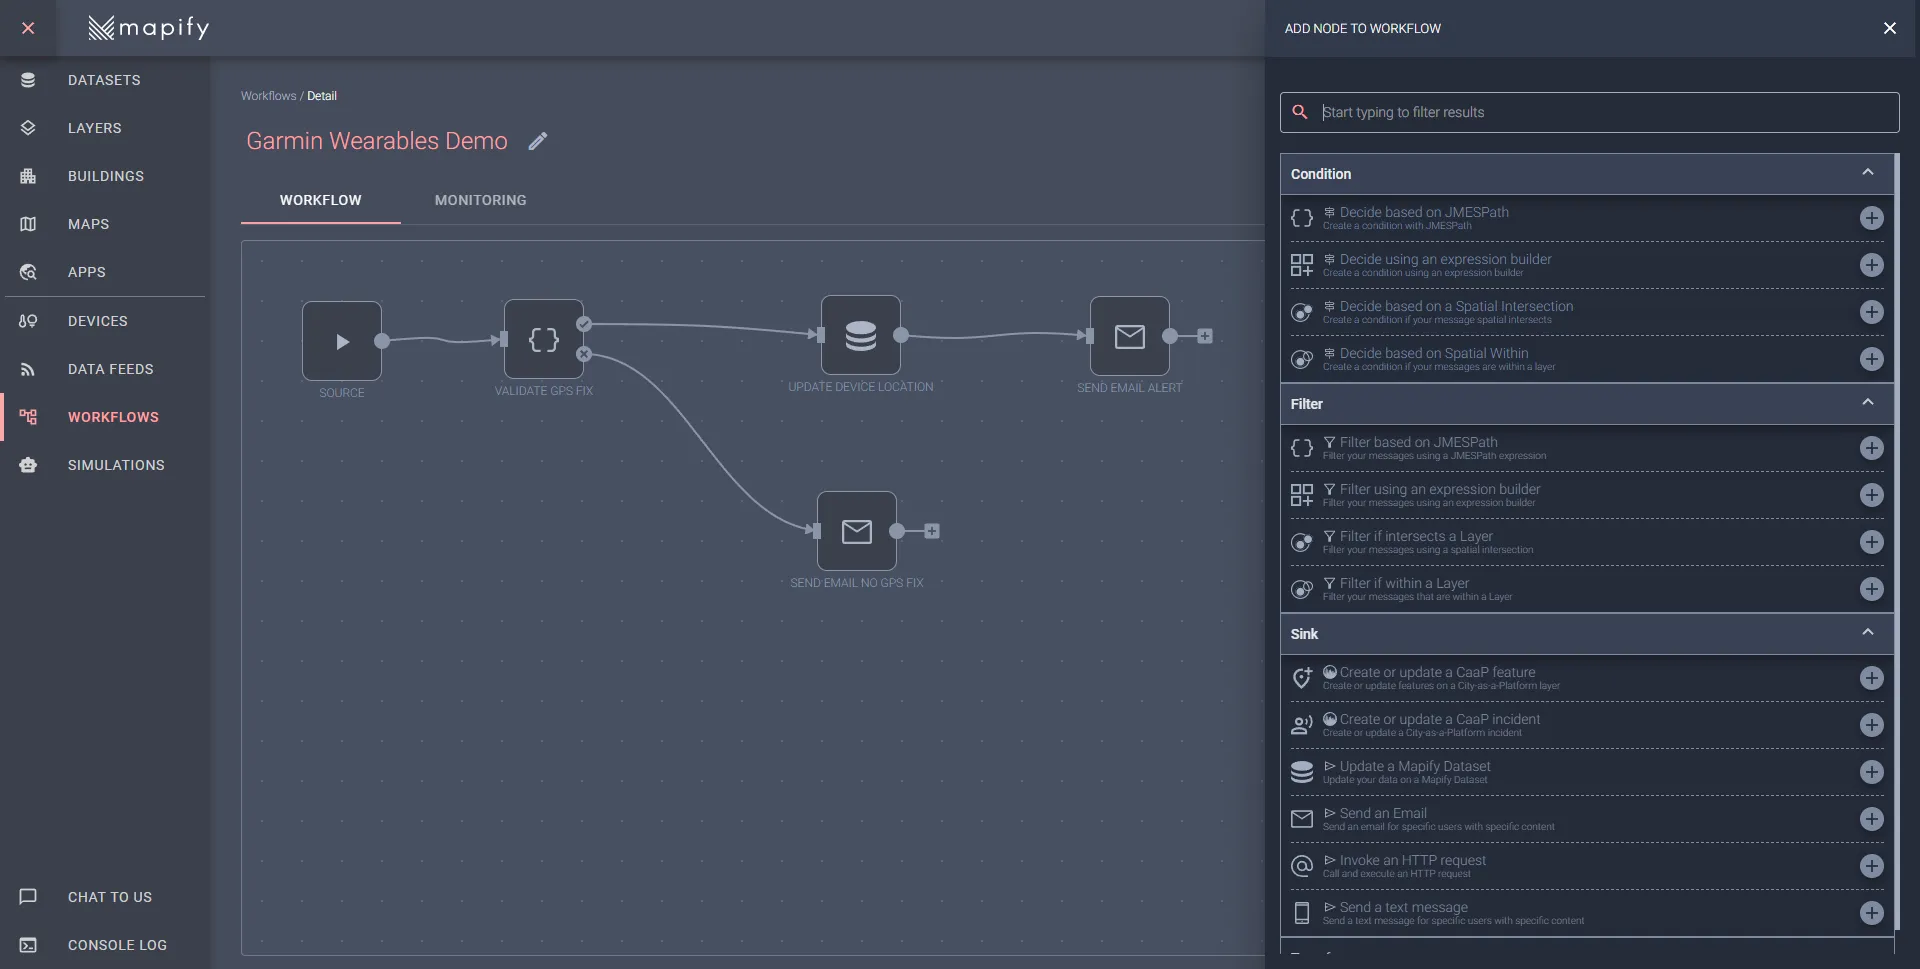
Workflow - Now all you have to do is to create a Workflow that handles the incoming data and saves it to the Dataset. Create a Workflow using the previously created Data Feed as its source, and add a Sink Node to save data to your Dataset.
Just for the sake of this article, in the example below we added validation for the accuracy and geographic coordinates to make sure there was a GPS fix when the position was sent. We also created an email Sink node to send an email when a message arrives.
Workflows can be as simple or as complex as your business needs, therefore it's up to you to come up with the greatest wearables solutions.
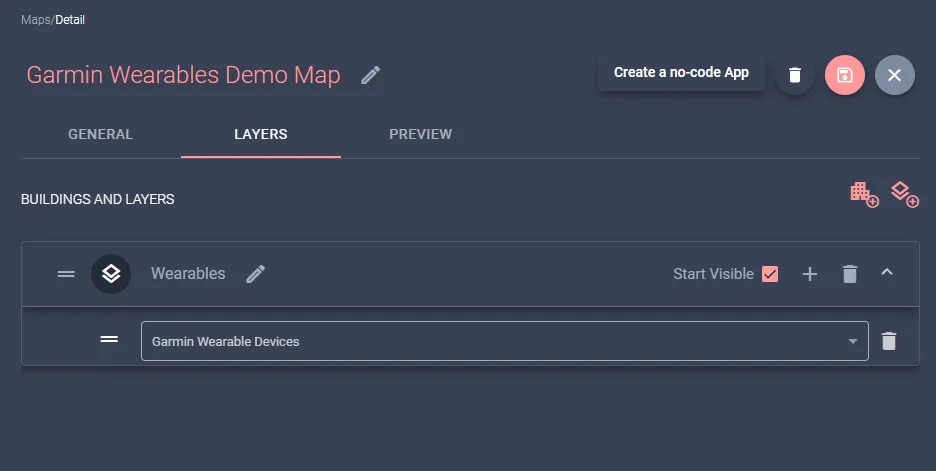
Map - Even though you already have a Layer to render your data, it is much better if you can actually share your data with others in a quick and simple way. Just use Mapify to create a Map and add your newly created Layer to it.
No-Code Web App - In order to have Mapify create an app based on your new map, you just need to click on the "Create a no-code App" button. Feel free to customize the look and feel of your app and much more.
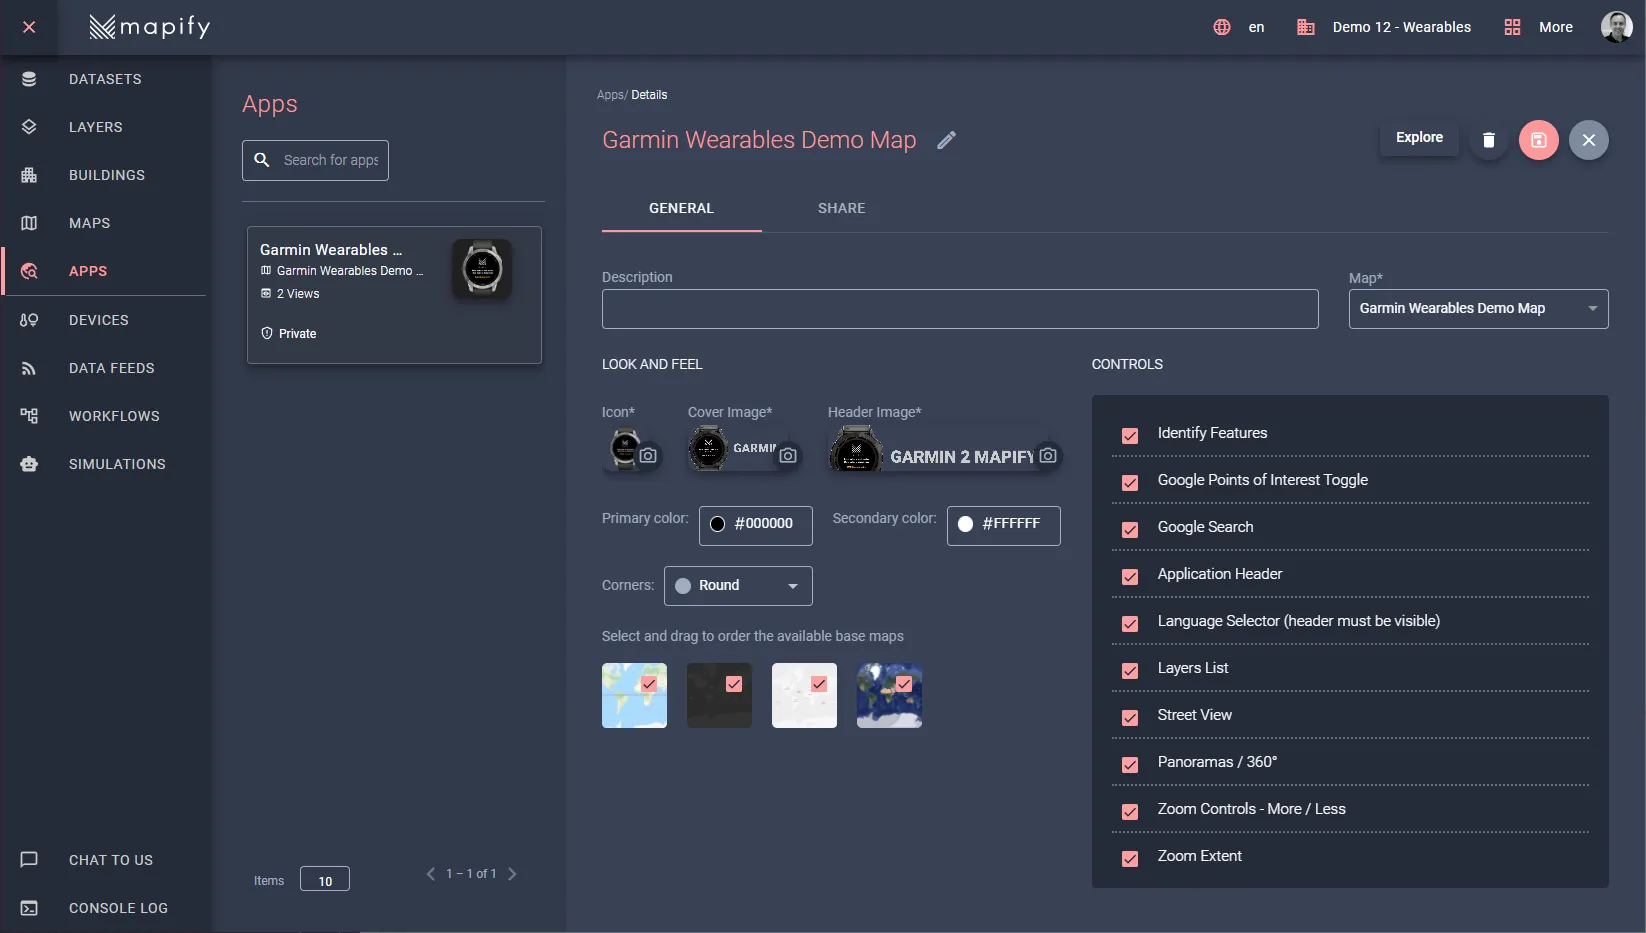
Once you're done, click on the "Explore" button, and you should see your app in all its glory. You still won't see the device data on it, but we'll do that in the next steps.
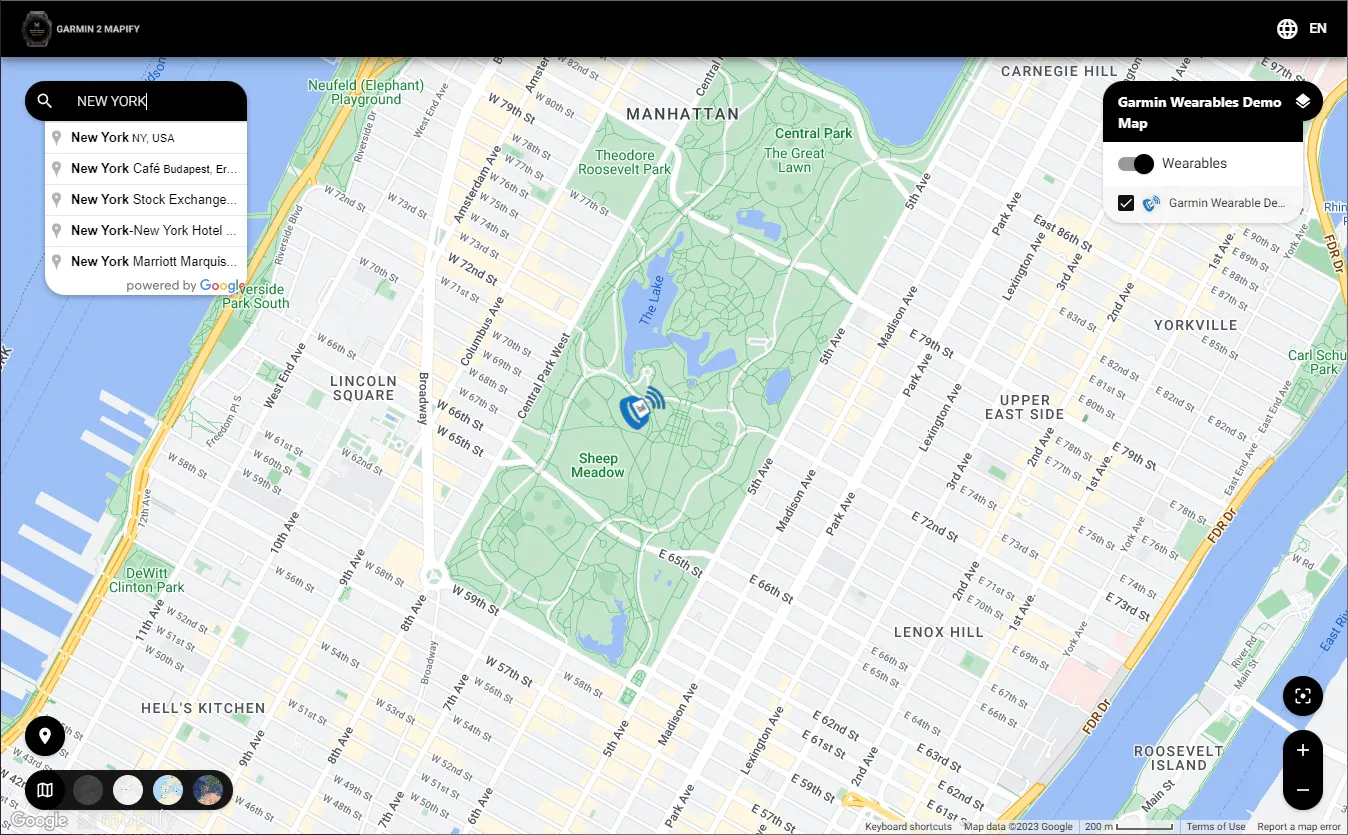
You could actually use Mapify Simulations to simulate incoming messages from your Garmin device and check if your Data Feed, Workflow, and App are working well. In this case, we will jump right into building your Garmin IQ app.
API Key - Anyone trying to use Mapify API endpoints will require an API Key with the necessary permissions. Your Garmin IQ app will be no exception. Consequently, be sure to create an API Key with the data messaging write permissions enabled.

2. Create your Garmin IQ app
It is not the purpose of this article to teach you how to develop Garmin Connect IQ apps, but we can tell you what you are going to need:
- Download and install the Garmin Connect IQ SDK (which includes Garmin devices emulators) and Visual Studio Code.
- Learn how to use MonkeyC language and the necessary Garmin devices API to build the wearable device app with the features you want.
- Make sure your Connect IQ app sends data to your previously created Mapify Data Feed using the API Key also created in a previous step (in our example app we use the App Settings to allow the user to configure its own data feed and Mapify API key).
- Test your app using the emulator for the device you plan to support.
- Publish your app to the Garmin Connect IQ Store.
3. Publish the data to a Data Feed
You can publish data to a Mapify Data Feed using MQTT or HTTP, but given the specifications of the Garmin Connect IQ platform, we're going to use HTTP.
We will invoke the publishAsync method from the Mapify API. This is how we do it with just a few lines of Monkey C code:
var envelope = {
"datafeedName" => mapifyDatafeed,
"message" => message
};
var options = {
:method => Communications.HTTP_REQUEST_METHOD_POST,
:responseType => Communications.HTTP_RESPONSE_CONTENT_TYPE_JSON,
:headers => {
"Accept" => "*/" + "*",
"Content-Type" => Communications.REQUEST_CONTENT_TYPE_JSON,
"Map-Api-Key" => mapifyApiKey
}
};
var logMsg = "Publishing message to data feed [" + mapifyDatafeed + "] (" + mapifyEnvironment + "):";
System.println(logMsg);
System.println(envelope);
Communications.makeWebRequest(
url,
envelope,
options,
method(:onReceive)
);
4. Install and use the app
Once you're done, build and submit your app to the Garmin Connect IQ store.
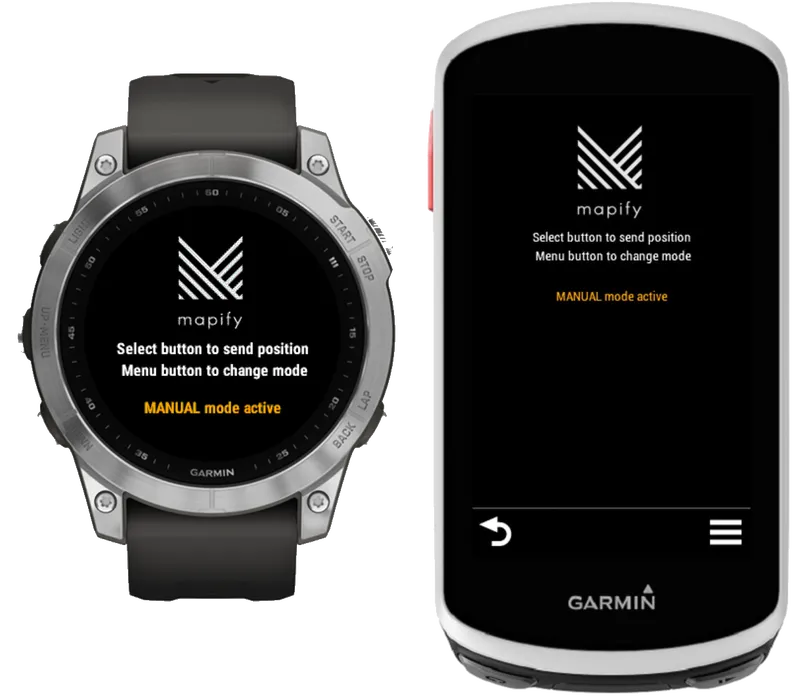
In order to help you get started, we have built a simple example app that publishes data manually (through the click of a button) or automatically (every X seconds) to a Mapify Data Feed, and you can check its full source code here.
If you happen to own a supported Garmin wearable device, you can download the app from the Garmin Connect IQ store. Once installed, don't forget to configure the Connect IQ app settings to your own Mapify Data Feed and API Key.
Are you a fan of wearables? Check out our article "5 IoT Wearables You Need To Know About".
Do you need help setting up Mapify with your smart devices? Book a call with us and let's figure it out together. If you still haven't joined our trial, do it here!
.jpg)